
Summary
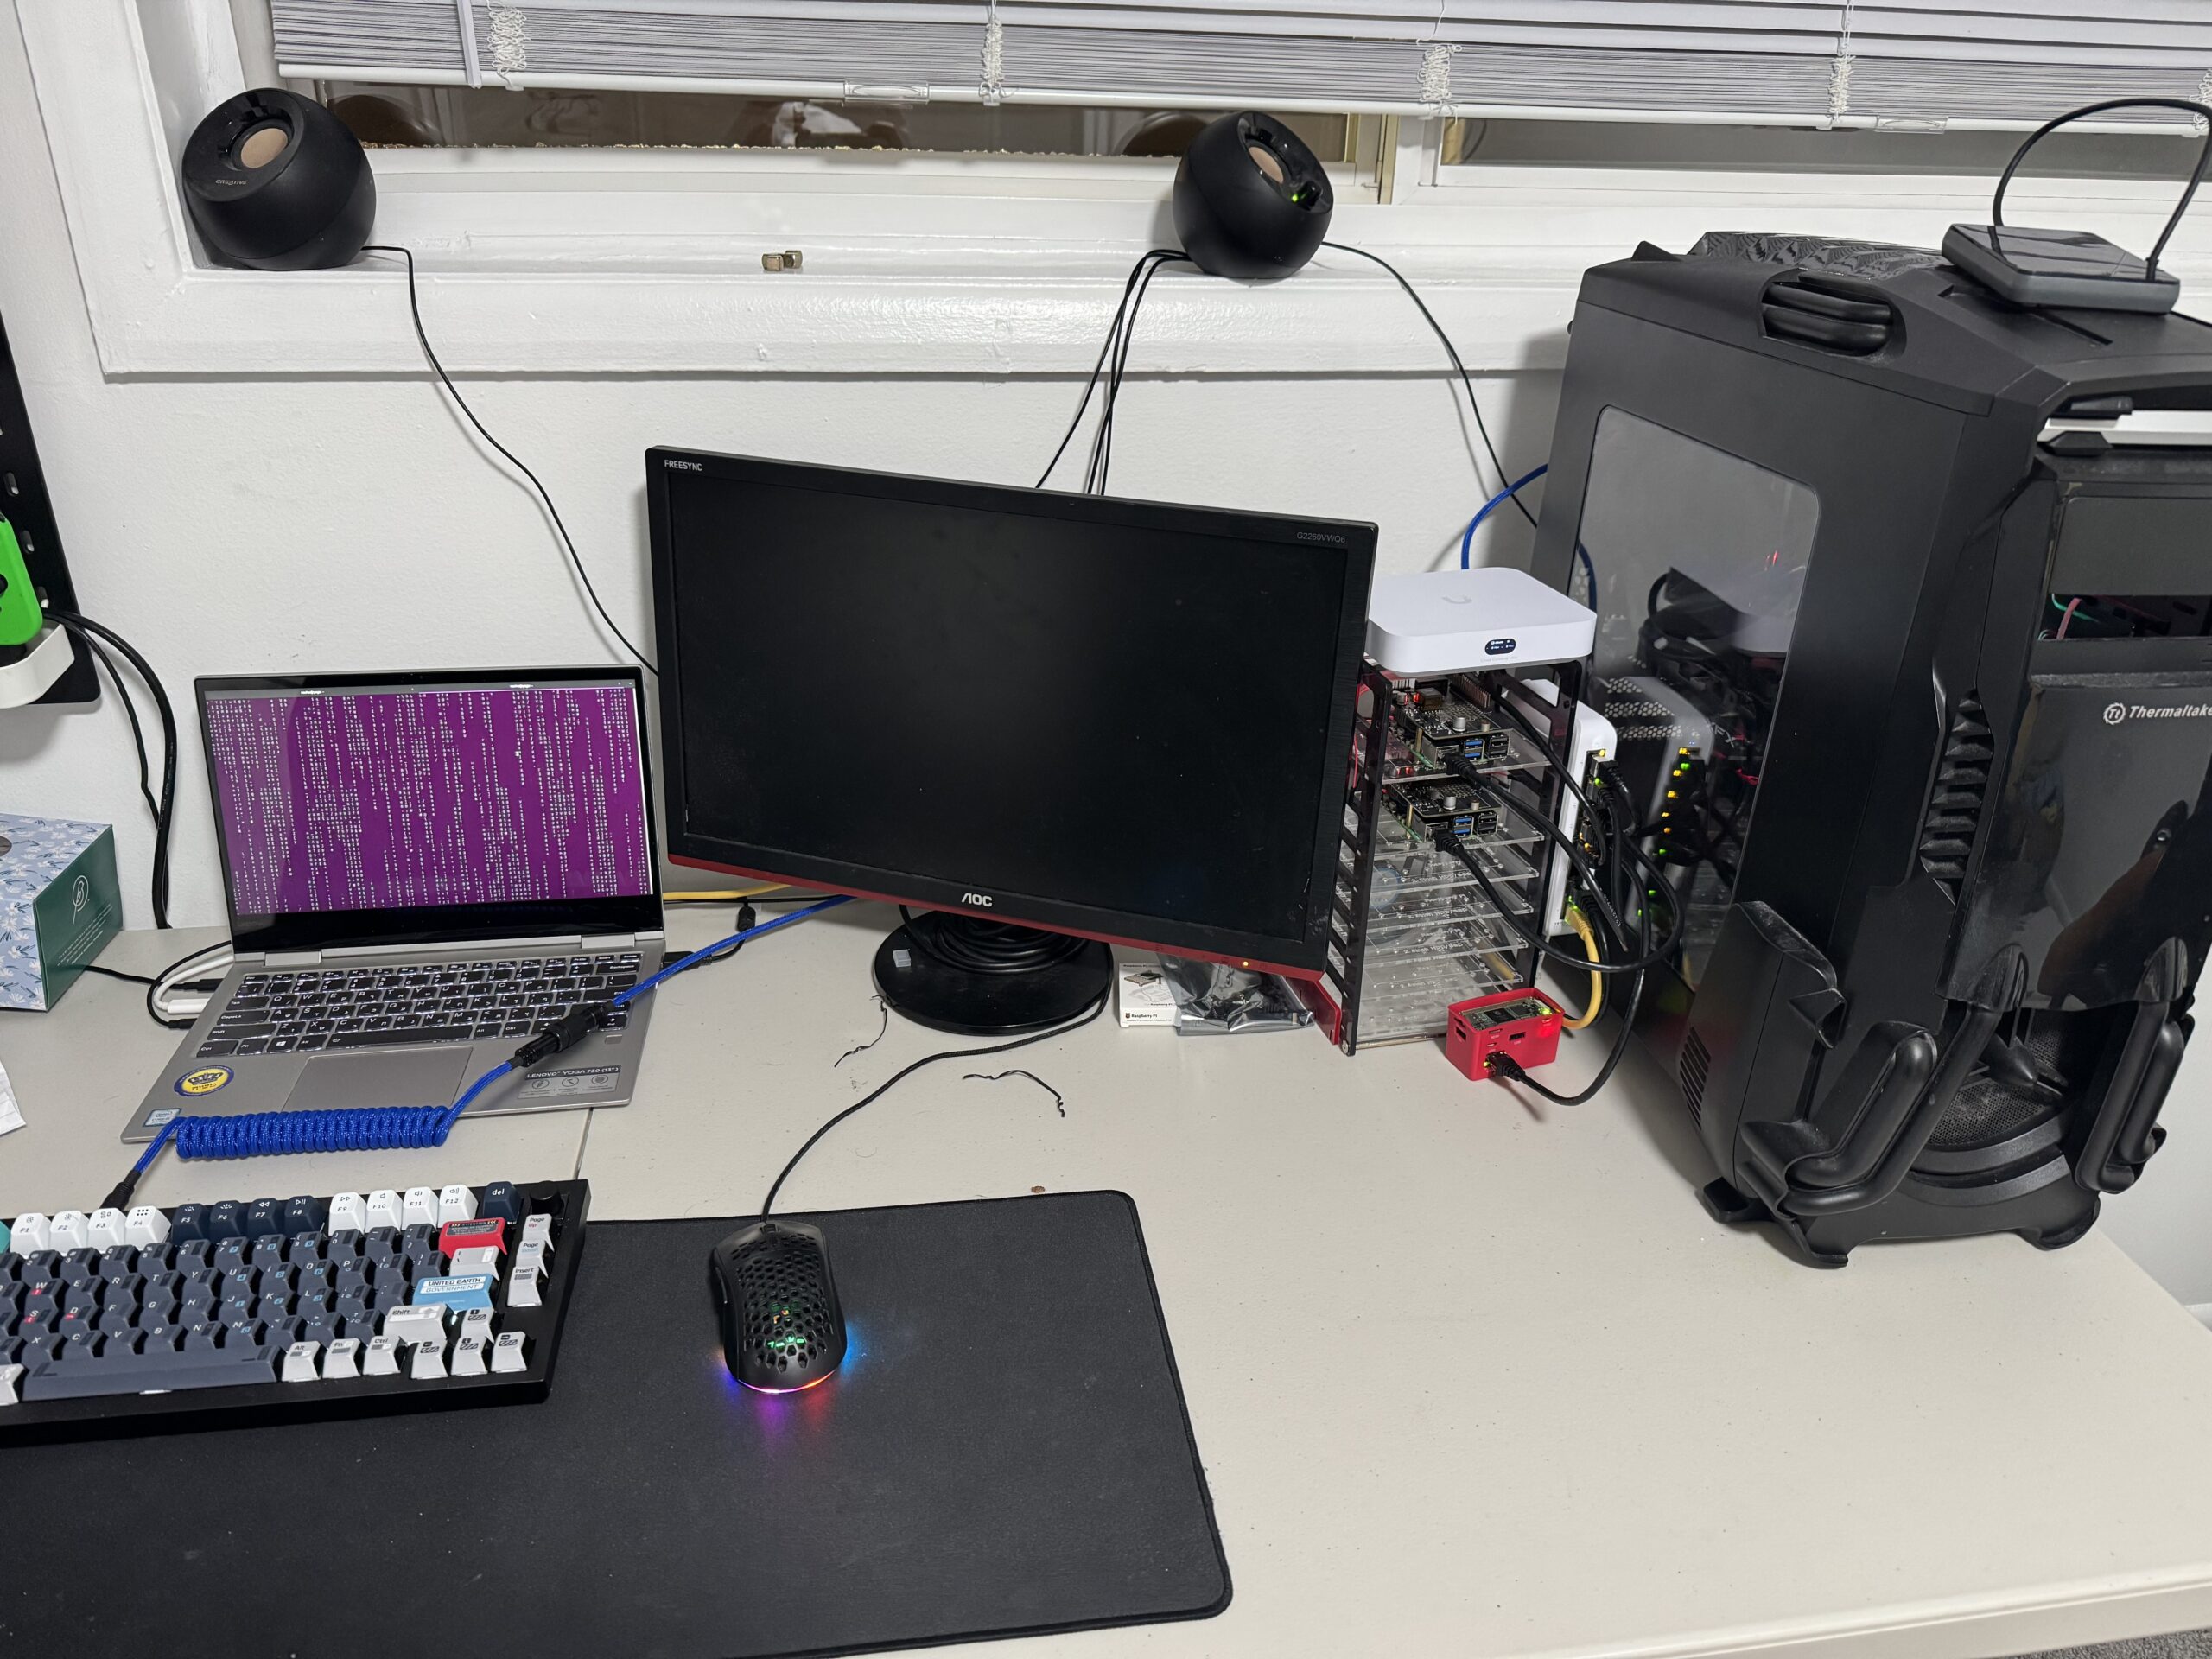
One of the first steps of my self hosting journey is to asses my current resources. My main device is a Lenovo laptop running Ubuntu for ease of use, even though my preference is Arch Linux with Hyprland. I am repurposing my old 2017-built PC as a server to explore virtualization and clustering. I’ve installed Proxmox as a hypervisor, set up Windows and Linux VMs, and plan to expand the system with minor upgrades as discussed below. Simultaneously, I am experimenting with a Raspberry Pi cluster comprising two Pi 5s with plans to implement Kubernetes, add another pi and research services. Lastly, I am using a Pi Zero 2 W for a basic DNS resolver for ad blocking.
My main objective of using older tech as the seminal point for my homelab is to get experience with the industry standards while coming up with creative solutions for the constraints of outdated technology.
Old PC
I build a PC in 2017 with the following Specs.
| Part | Specs |
|---|---|
| CPU | Intel i5-6600K |
| RAM | 16 GB |
| Motherboard | Asus Z170 |
| Graohics Card | Gigabyte 1060 6GB |
| Storage | M.2 2 TB |
| Storage | SSD 250 GB |
| Storage | SSHD 2 TB |
Now that this PC is outdated, I intend to build I new PC with more robust specs. In the meantime, I am converting this PC to a server. Given my interests in virtualization, this may be a good opportunity to experiment with clustering, VMs and applications. I have plans to make a NAS and eventually cloud service which I may use this as the hardware for these services.
Thus far I have installed Proxmox as a hypervisor. I have 2 VMs to use at my leasure. One of them is a windows 10 VM. Apparently, my PC doesn’t meet the requirement for Windows 11. I have an old 1 TB external storage device with data I need and I found Linux doesn’t recognize it so using the Windows VM, I can access that data.
Going Forward
- I will add more HDDs to make a NAS with RAID.
- Remove GPU for power savings. To keep energy costs down, I will probably take out the graphics card and utilize it in the new PC as I have no intention to game on this machine anymore.
- Move to rack mount Case
- Expand RAM to 32 GB. The price for compatible RAM is quite cheap and adding another 16 GB to give my old PC a small boost for virtualization may be beneficial.
- Linux Arch VM
Raspberry Pi Cluster
- Pi 5 8GB
- Pi 5 8GB
- Pi Zero 2 W
I recently purchased 2 Pi 5 8GB and Pi Zero 2 W to have more hardware to play with.
Initially I used a Pi 5 for pihole DNS ad blocking but I migrated that service to the Pi Zero since the Pi 5 is overkill for that service.
With my Pi Zero handling the DNS Ad Blocker, I intend to experiment with Kubernetes. I am not sure which services I want to host on the pi cluster yet. I am still playing around with the idea of hosting another website on there, as previously discussed. Also, any service which could benefit from High availability with a small enough footprint to be performed on a single pi. Maybe a small SDD NAS service, you can never have too much. More seriously, a password manager would be my main focus for utilizing the Pi cluster or note taking app with syncing capabilities.
Going Forward
- Purchase another Pi 5 to attain a quorum for high availability
- Small M.2 SDDs replace the SD card
- Install kubernetes
- Research applications to host on it.
Laptop
Currently running a Lenovo Yoga 730 13″ with Ubuntu. Originally, I was running Arch Linux on both this and my old PC. The constant effort to maintain became cumbersome so I switched to the simpler Ubuntu until I can learn more about Linux systems and maintaining Arch. I actually enjoyed Arch with Hyprland more than Ubuntu so I may switch back later.
Since this is my main PC, I don’t want to experiment too much with it. Main usage will be basic browsing, Homelab management and so on.
Going forward
- May add m.2 ssd to expand storage size. If necessary.
- USB-C Dock for expanded peripherals
Leave a Reply